How to Setup SSO using Microsoft Entra ID
VIDIZMO offers your organization high flexibility and low cost of SSO integration with several identity providers, including Microsoft Entra ID (formerly Azure AD). VIDIZMO allows its customers to utilize their Entra ID system for facilitating its Portal users with Single Sign-On (SSO) capabilities. Not only this but with an app model SSO integration, VIDIZMO makes the integration as easy as enabling/disabling your Entra SSO from within the platform in minutes.
Note: Microsoft Entra does not allow Single Sign-On for embedded Media on other platforms. Read more about it here.
To learn more about SSO options with VIDIZMO, read Understanding Single Sign-On.
This article provides you with a step-by-step guide to configure SSO using Microsoft Entra ID with your VIDIZMO Portal. Configuration consists of the following two sections:
- Configuration in Microsoft Entra Admin Center (or Azure Portal)
- Configuration in VIDIZMO Portal
- Configure Access of Users or Groups for VIDIZMO SSO
Configuration in Microsoft Entra Admin Center
This section requires you to create an application on the Entra Admin Center. To register an application in your Microsoft Entra tenant, follow the steps under Register an application with Microsoft Entra ID and create a service principal. After registering an application, follow the steps below to proceed.
Note: You can also perform some of these steps here to create an application in your Azure Portal for the SSO setup.
App Authentication
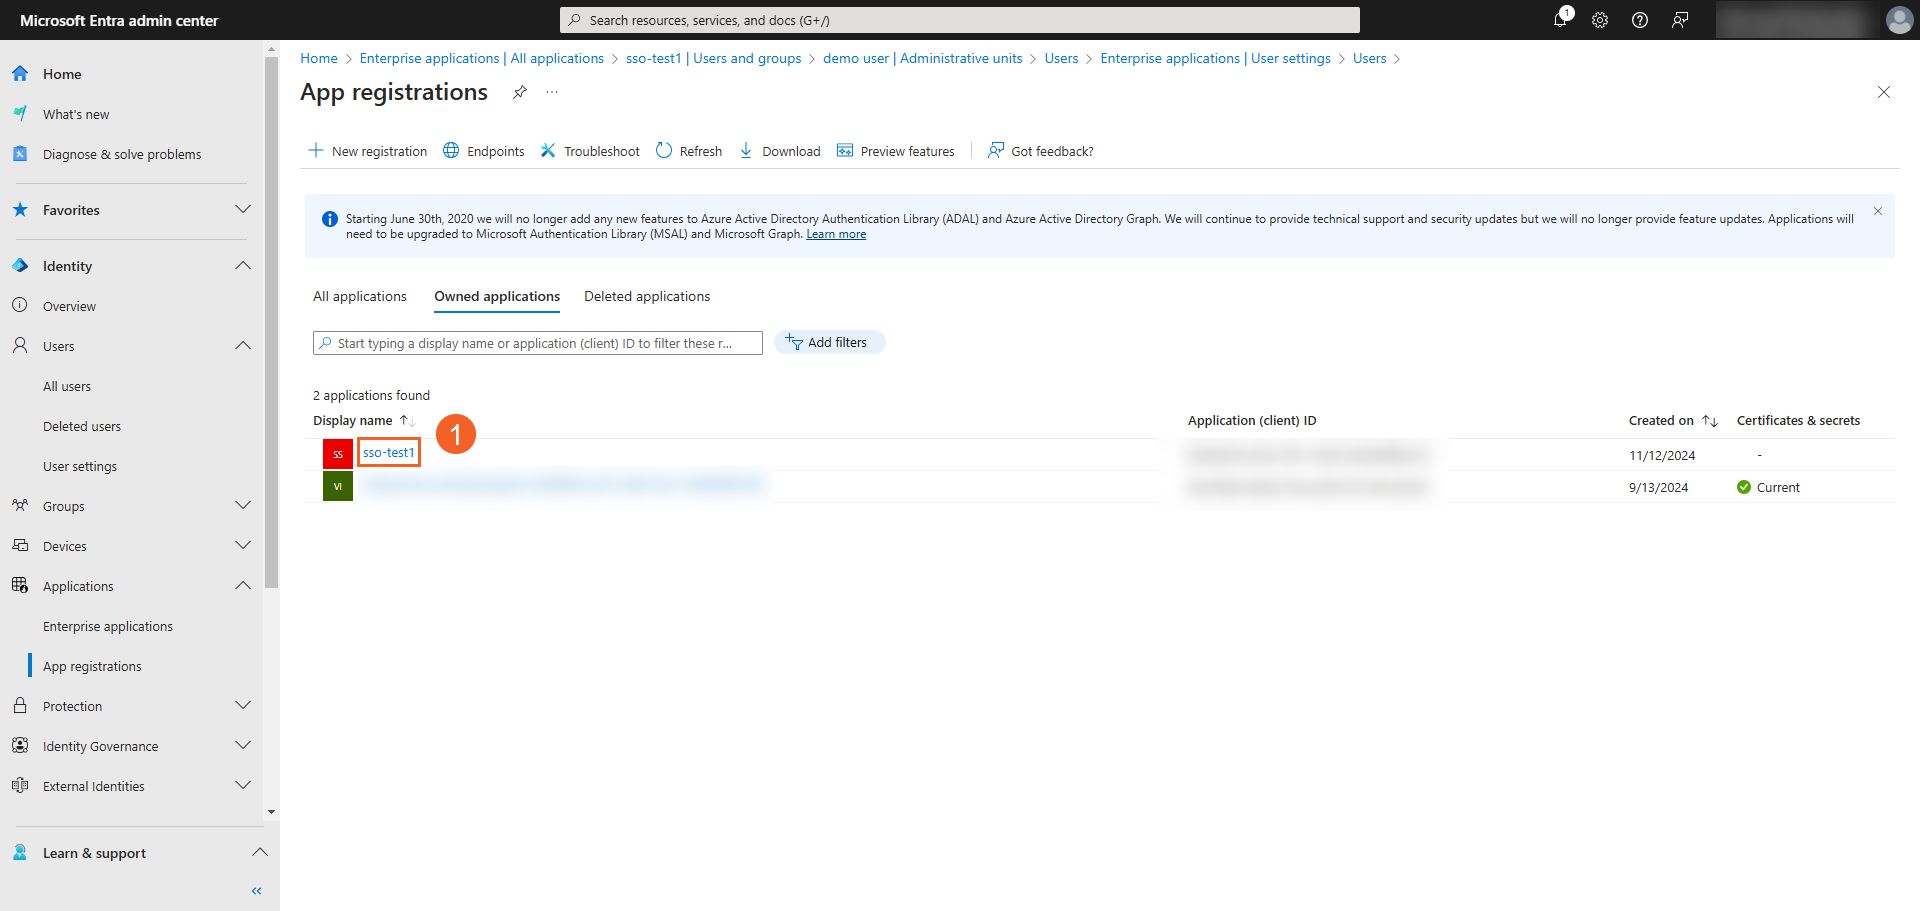
- On your Microsoft Entra admin center, click Identity > Applications > App registrations and select the application you just registered.
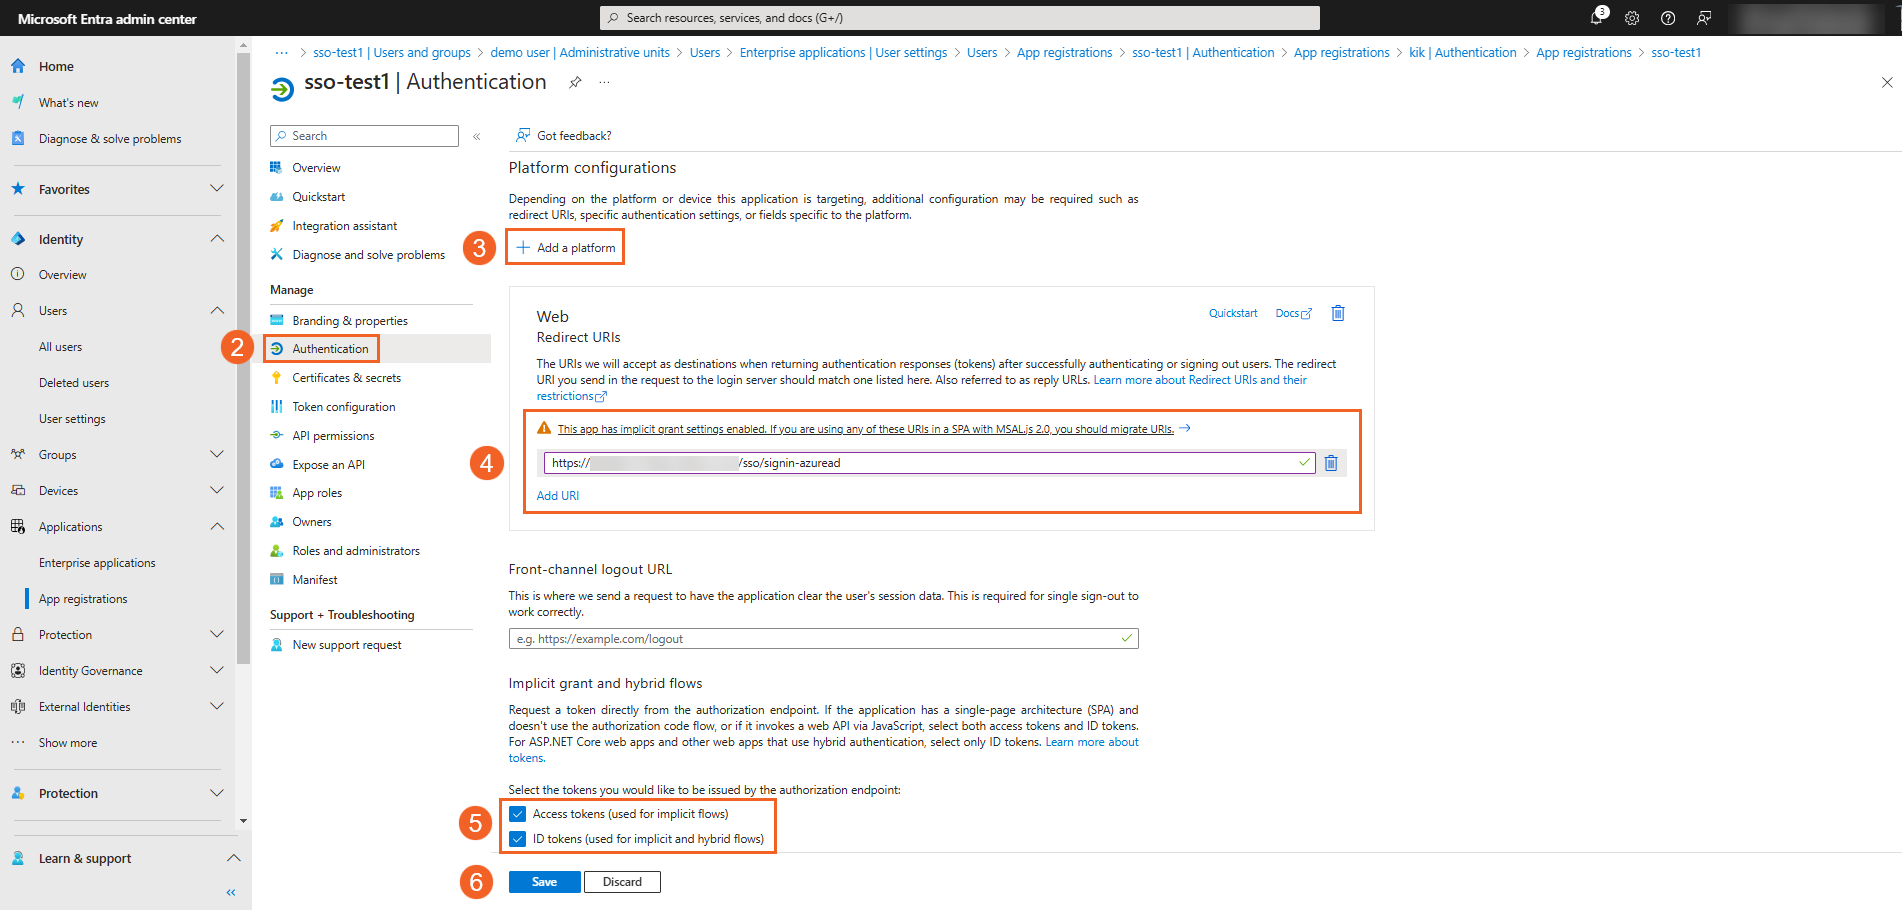
- Select Authentication.
- If you haven’t added a platform or a URI during the initial registration, select + Add a platform and select Web.
- In the Web’s Redirect URI section, select Add URI to enter a Redirect URI where Microsoft Entra ID will redirect you after user sign-in is done. This URL would be your VIDIZMO Portal URL with
/sso/signin-azureadconcatenated to it. An example would be:https://lexcorp.VIDIZMO.tv/sso/signin-azuread
Note: You need your Portal domain to have https, to learn more, see: How to configure your Portal to use HTTPS only.
- under the heading Implicit grant and hybrid flows, you need to select the token you would like to be issued by the authorization endpoint. Since VIDIZMO is a single-page application that invokes a web API via JavaScript for authorization, select both Access tokens as well as ID tokens.
- Click the Save button.
API Permissions for SSO
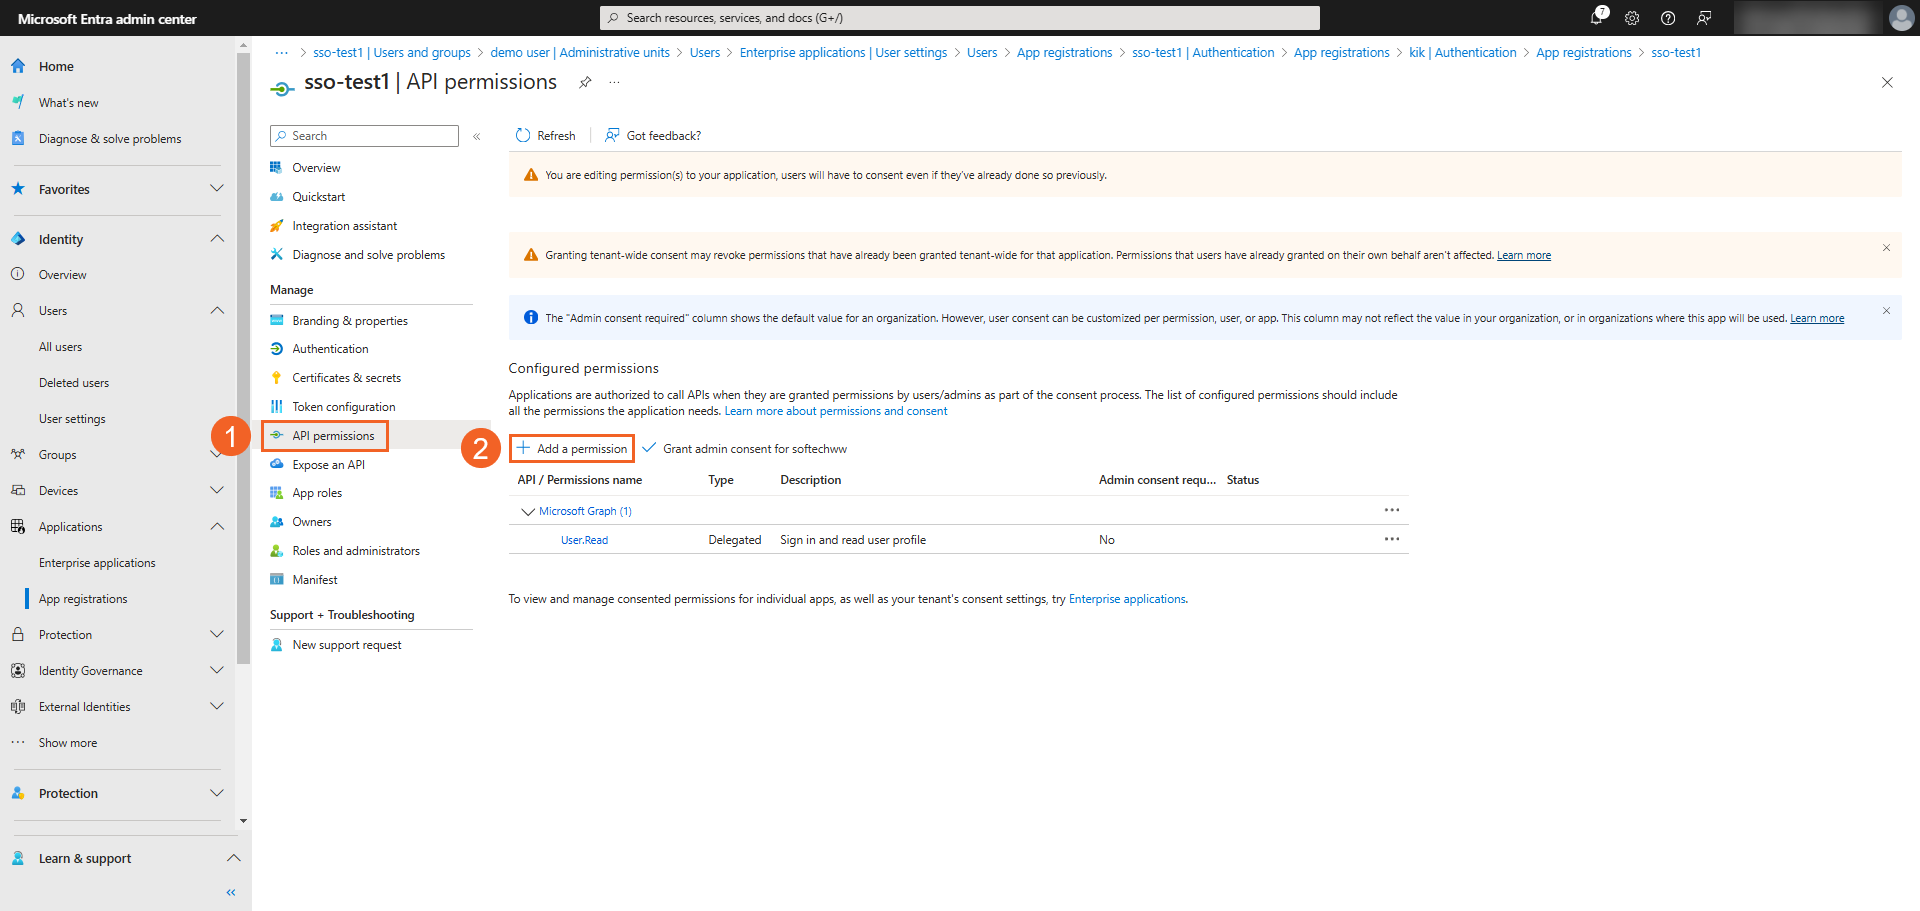
- From the app’s page, select API permissions.
- Under Configured permissions, click + Add a permission.
- On the Request API permissions pane, click Microsoft Graph.
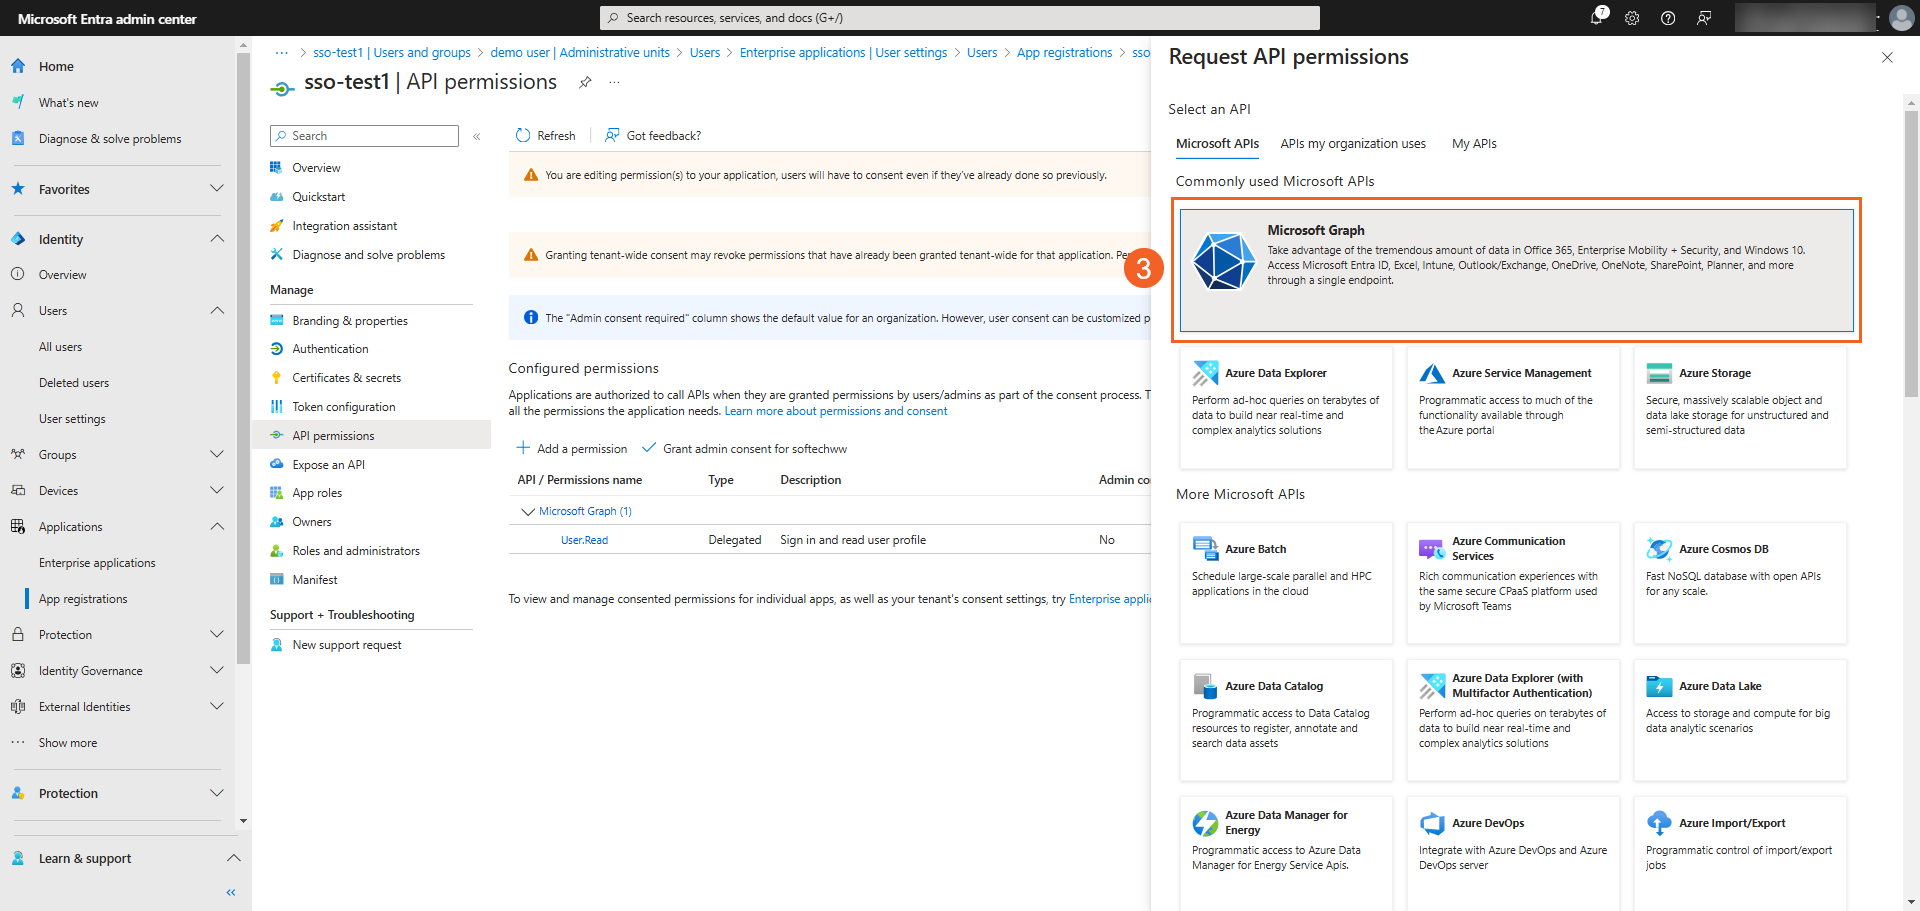
- Select Delegated permissions.
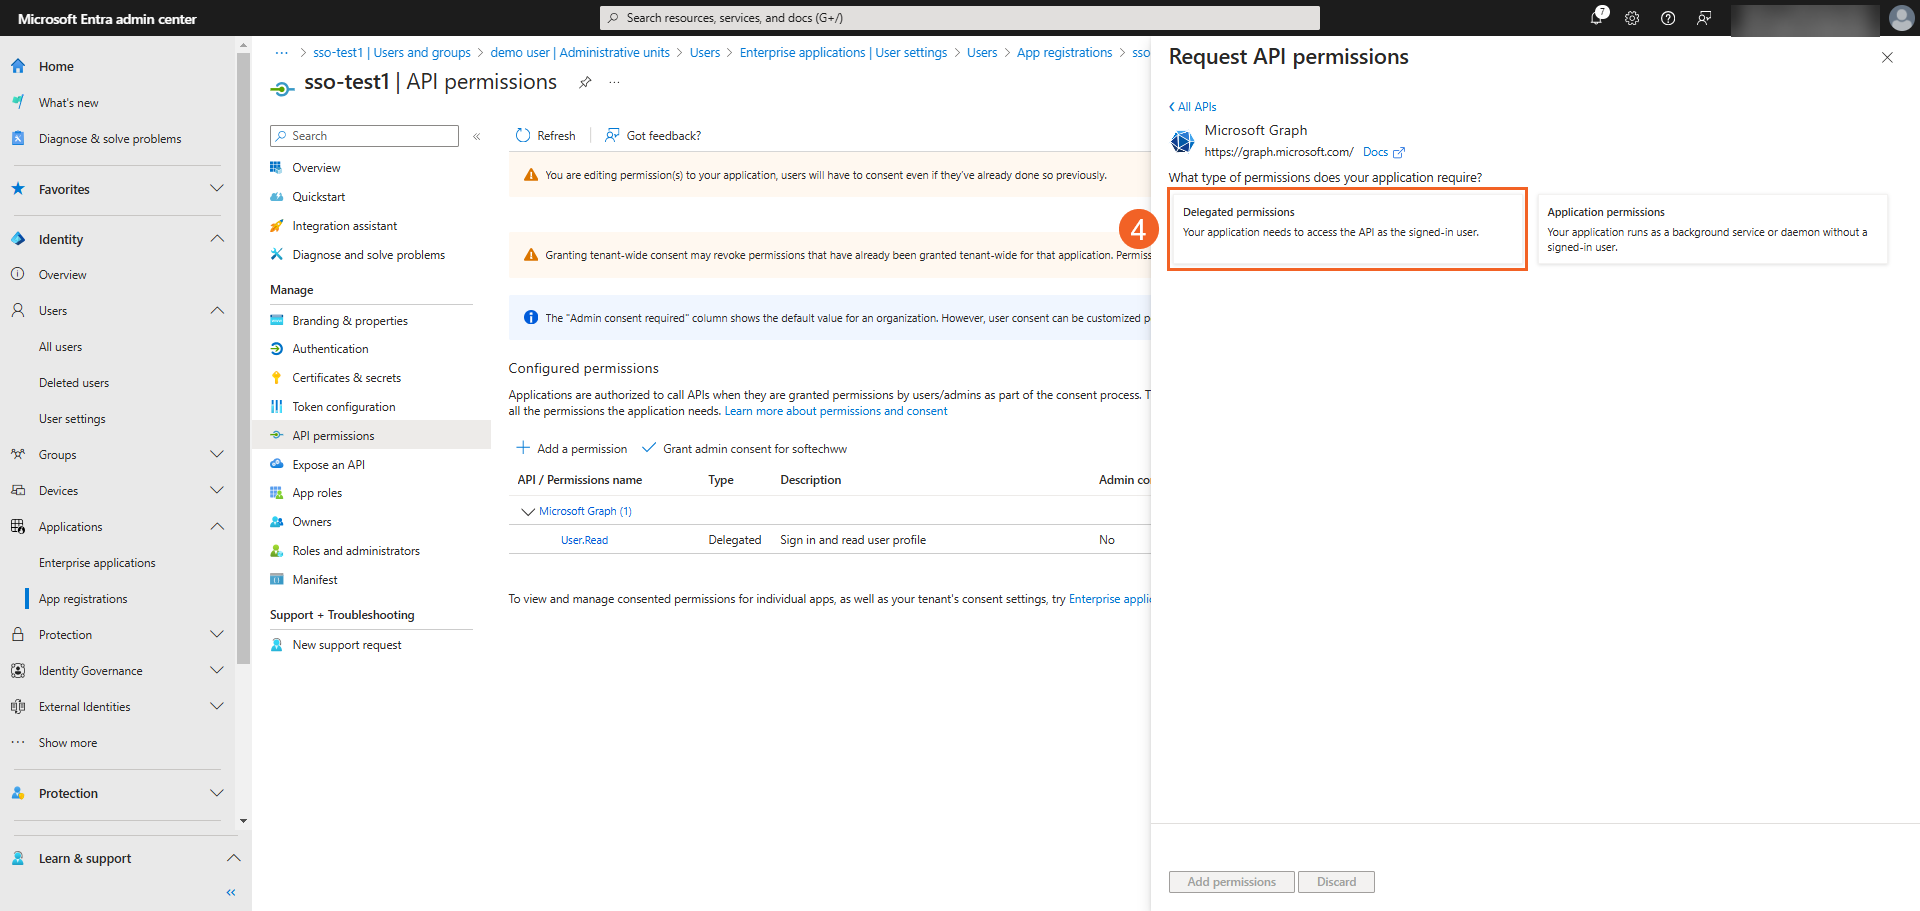
-
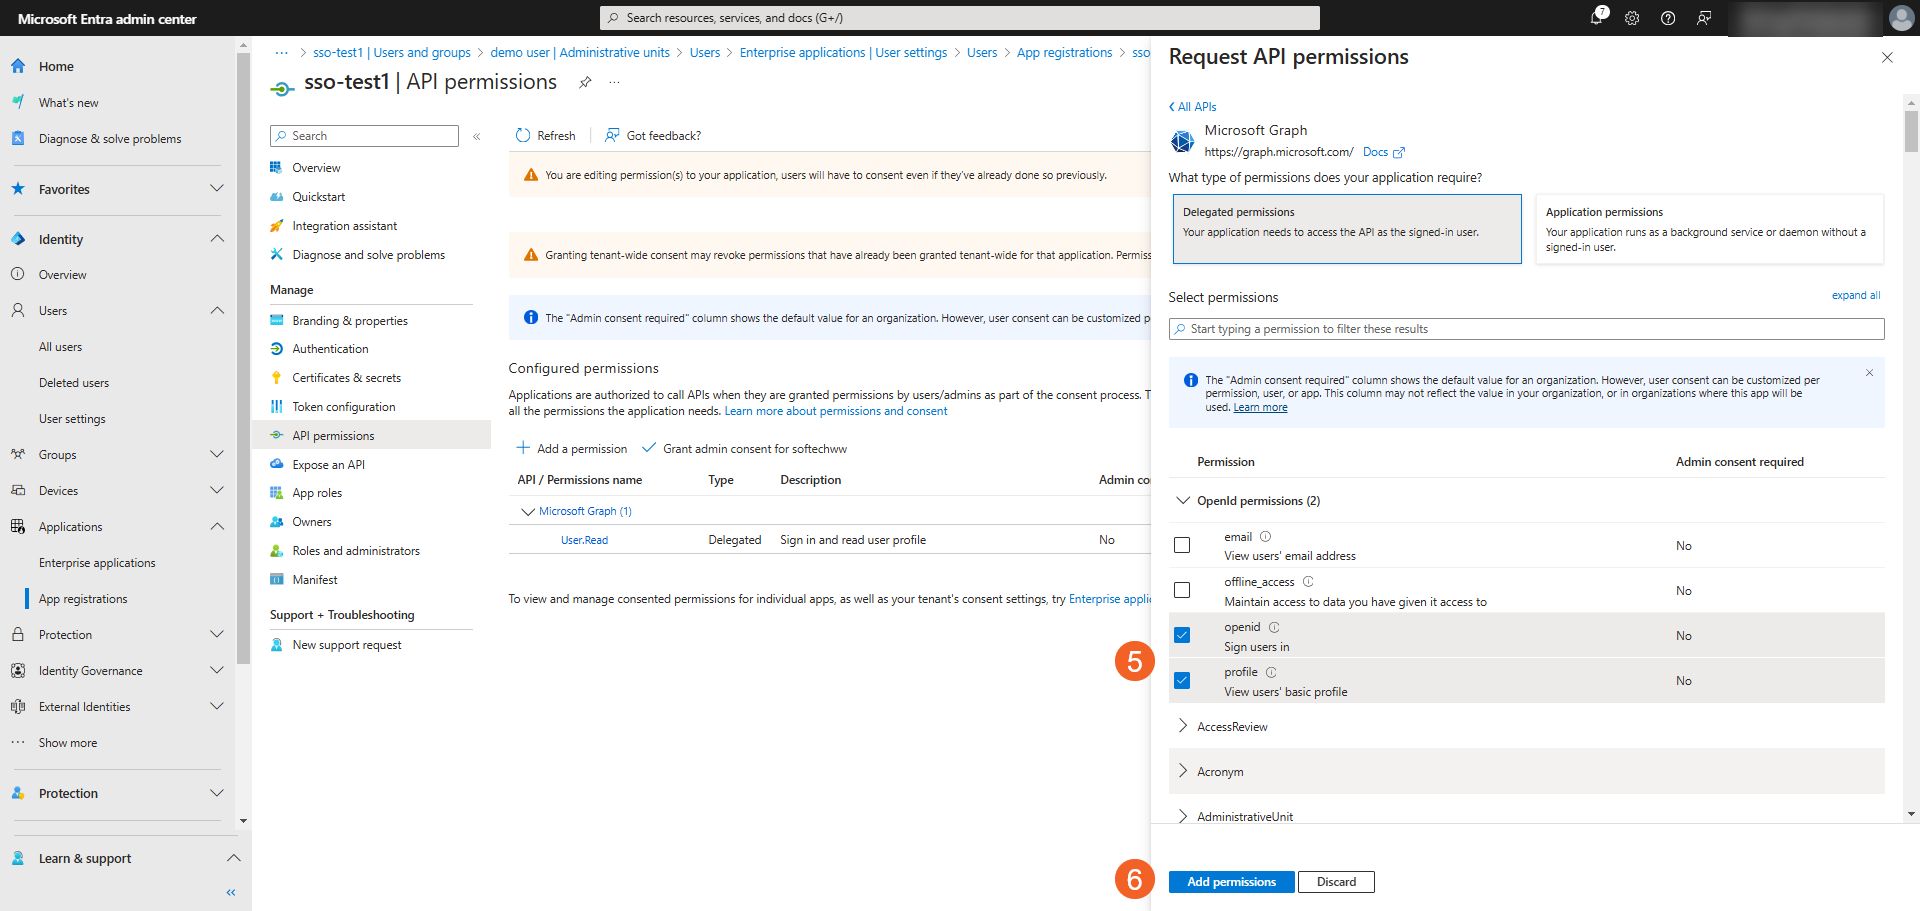
You need the following permissions selected to utilize SSO in VIDIZMO:
- User.Read
- openid
- profile
- Directory.Read.All
-
Click Add permissions to add them to the application.
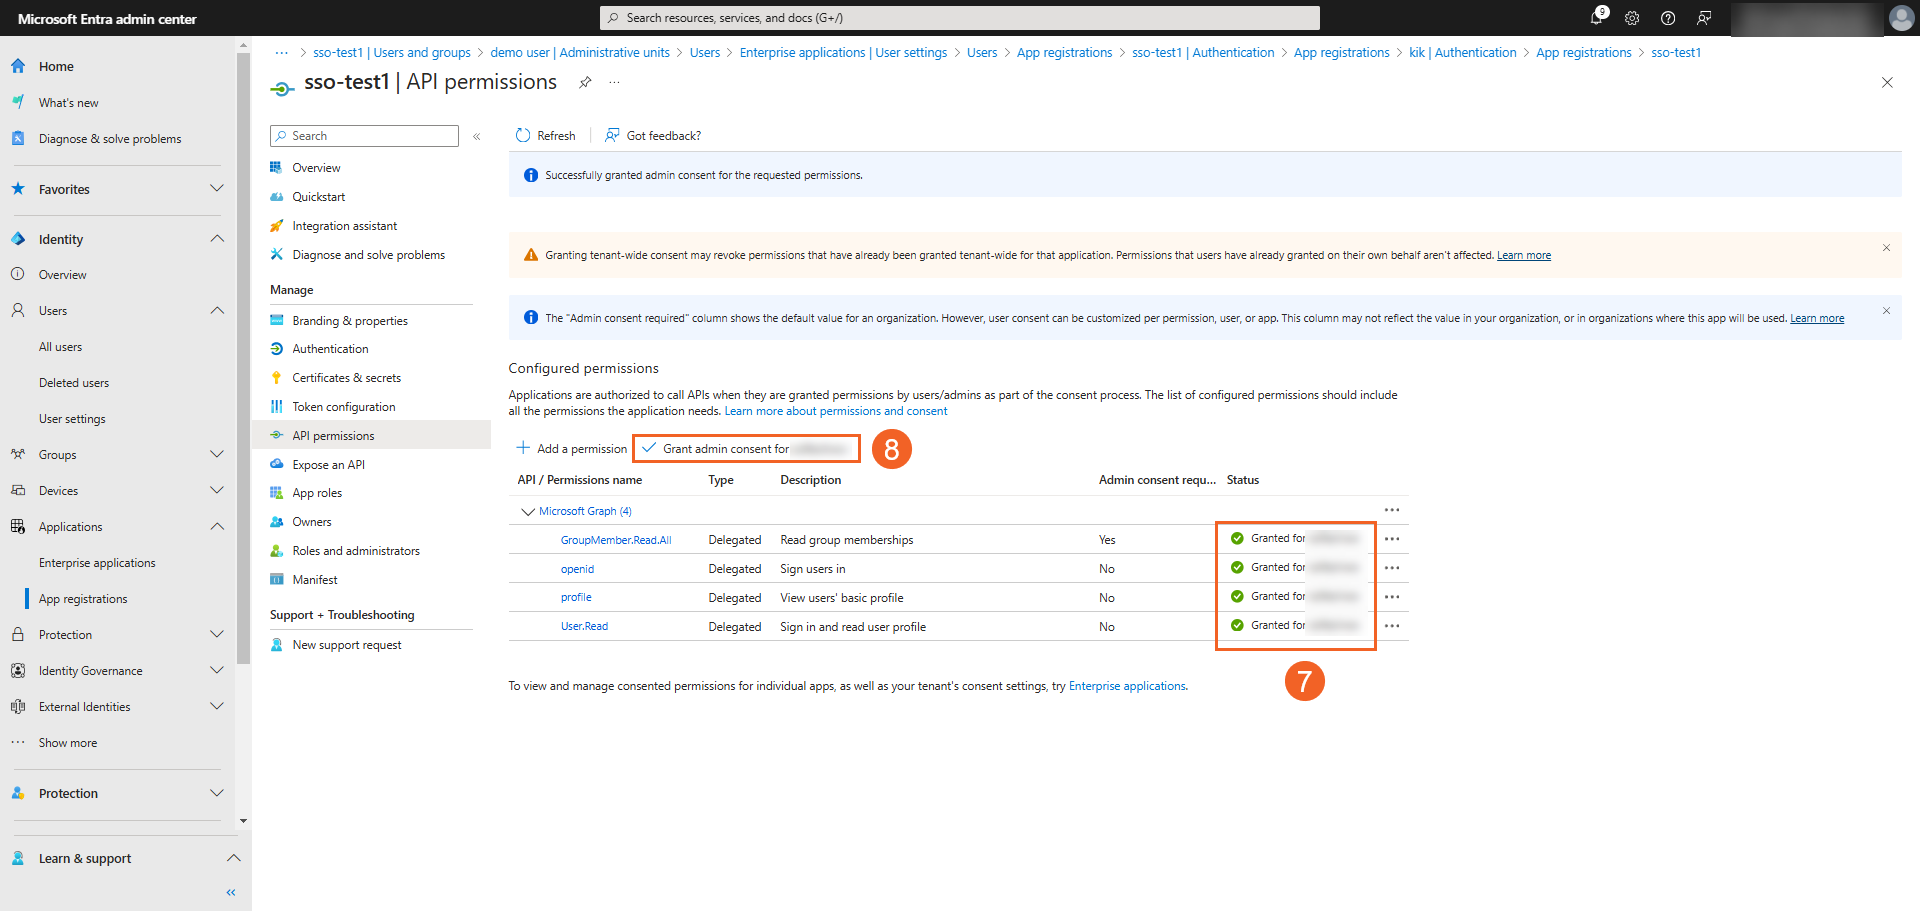
- Ensure that all permissions are granted or enabled.
- Click Grant admin consent for your organization's name to grant those API permissions that require admin approval. To do this, you need to have a role that has this permission, or you would need to contact an administrator.
Obtaining App Information
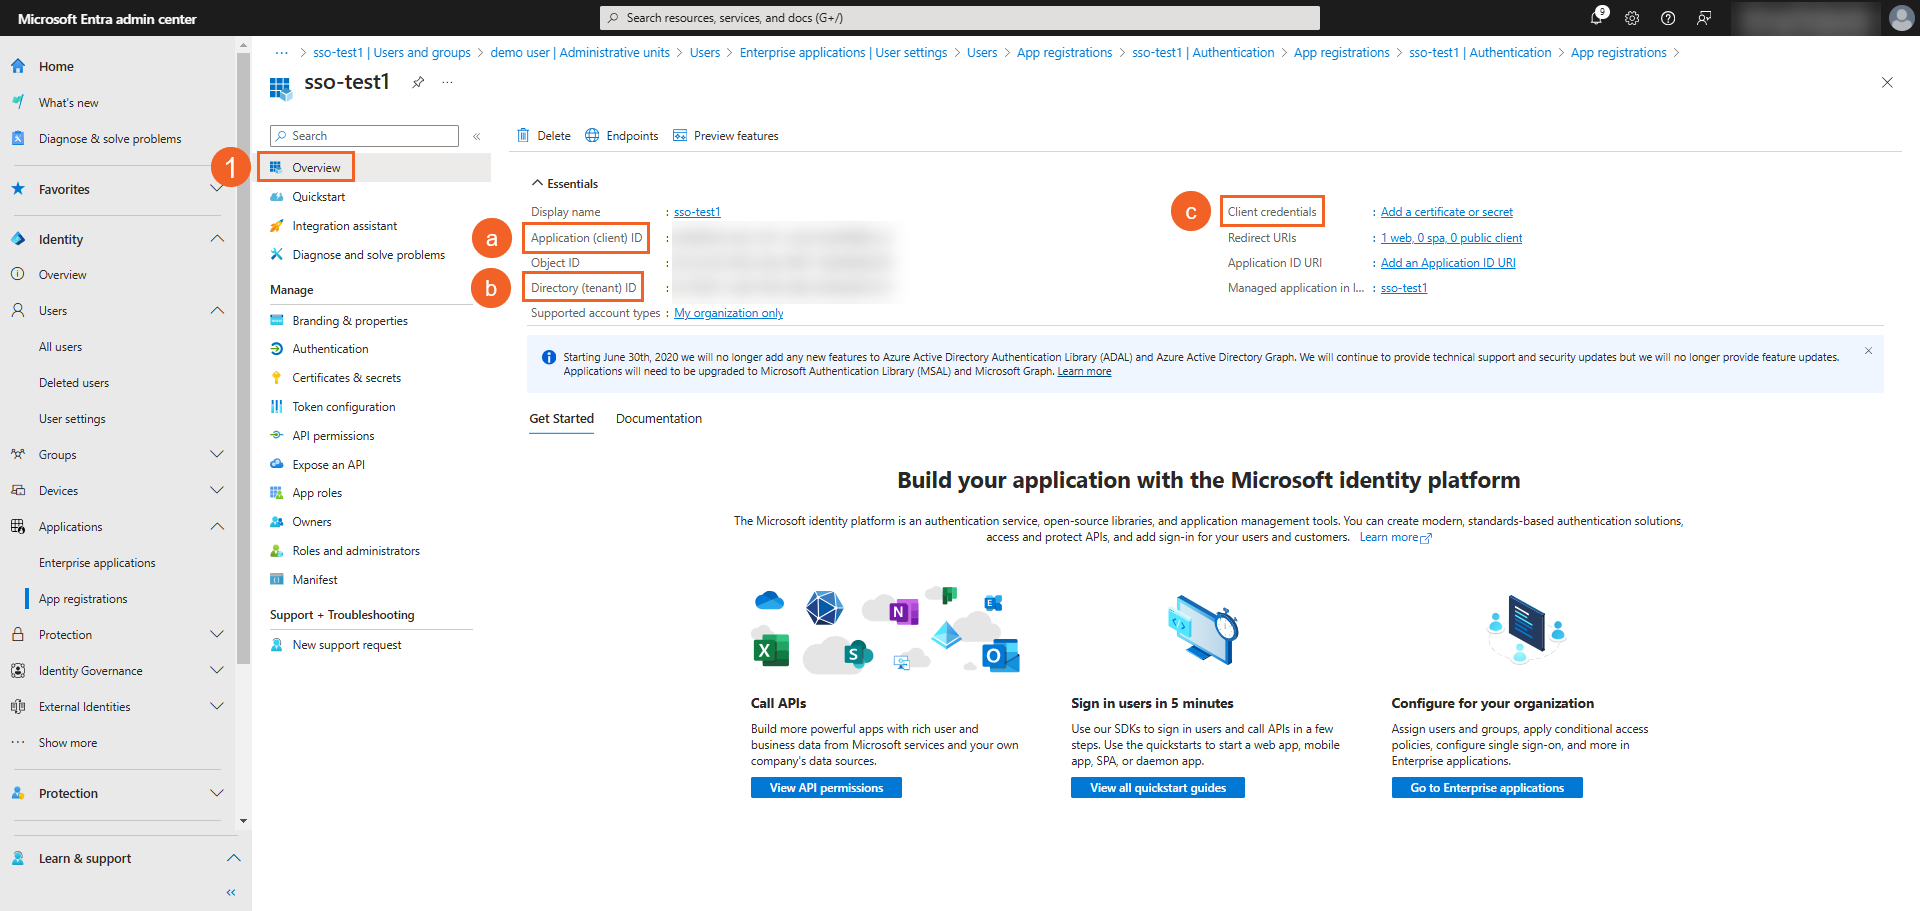
- Click the Overview tab and get the following information:
- Application (client) ID
- Directory (tenant) ID
- Client credentials or Client Secret: this can be generated by clicking the Add a certificate or secret and is required when you are using ID with Code as the Response Type in the SSO app in VIDIZMO.
Configuration in VIDIZMO Portal
Now that you have the resources required to configure Microsoft Entra ID SSO in your VIDIZMO Portal, follow these steps:
-
From the Portal's Homepage.
- Click on the navigation menu on top-left corner.
- Expand Admin tab.
- Click on Portal Settings.
-
On Portal Settings page,
- Click on the Apps tab on the left-hand panel.
- Further click on the Single Sign-On tab.
- Locate the app on the screen and click on the Settings icon the right-hand side.
-
After clicking on the Settings icon, a window will appear:
-
Client ID: Paste the Application (client) ID in the Client ID text box.
-
SSO Login Message and Label enables you to set your own custom message for users on the login page to familiarize them with which option they ought to use for signing in.
-
Authority: Replace
<directoryId>with the Directory (tenant) ID in the following URL:https://login.microsoftonline.com/<directoryId>/v2.0, then paste it in the input field.Note: Authority URL endpoints will differ based on the Azure Region you choose below. Here is an article that can guide you on which endpoint to use before you append your Directory ID: Microsoft Entra Authentication Endpoints.
-
Enable or disable the following options to adjust the SSO configuration:
- Requires HTTPS Metadata: Select this check box to ensure HTTPS is required to get the metadata. When the request is handled for the first time, it tries to retrieve some metadata from the authorization server (also called an authority or issuer). This metadata, or discovery document in OpenID Connect terminology, contains the public keys and other details needed to validate tokens.
- Force Login: Enable this to make sure users can sign in when VIDIZMO sign-in has been turned off.
- Redirect by POST Request: Enable this to ensure that redirection takes place via a POST request that does not expose your token in the URL.
- Group Synchronization: VIDIZMO can sync groups from Microsoft Entra ID, so ensure your Entra groups (e.g., the specific group for VIDIZMO access) are mapped correctly in the Attribute Mapping section. This will make sure users are correctly categorized within VIDIZMO based on their group memberships in Microsoft Entra ID.
-
Callback Path: Specifies the callback location where the authorization will be sent to your Portal.
-
Scope: OpenID Connect uses scope values to specify what access privileges are being requested from the Microsoft Entra ID authorization server. They determine the scope of the access request being made. We include the following scopes while authentication:
- openid is one of the basic scopes that defines the intent of the application to verify the identity of the user.
- profile is a scope value that defines the request to access user's default profile attributes or claims such as name, gender, picture, etc.
- user.read grants permission to access the complete profile of the user, which helps in complete attribute mapping.
- Directory.Read.All is used to grant access to the organization's directory which helps define groups in VIDIZMO that map onto organizational units to streamline content management within the Portal.
-
Response Type: Specifies the response type for OIDC authentication. Any combination of code, token, and id_token is used and is an opaque value that can be used to redeem tokens from the token endpoint. It is recommended that you select ID with Token from the drop-down menu. The option for ID with Code is available for backward compatibility with the apps registered in VIDIZMO before the flow for ID Token was introduced, here we will need the Client Secret key generated in the last section to access the token.
-
Select Azure Region based on the type of subscription you have. Read more about Global and Government subscriptions here: Compare Azure Government and global Azure.
-
Save Tokens: This option remains enabled to map users to their organizational units.
-
Attribute Mapping: Attribute Mapping allows you to map your attributes with the IdP's attributes. There is also an option where you can configure the default CAL assigned to the Microsoft Entra users who will login to the VIDIZMO Portal using Microsoft Entra SSO. Note that this setting will override the default CAL you have configured in the Control Panel.
-
Click on the button Save Changes.
-
Configure Access of Users and Groups for VIDIZMO SSO
If you want to set up permissions for specific users or groups that will utilize the VIDIZMO SSO, then you can do so from the app configurations in Microsoft Entra admin center.
Setting Up Permissions
The first step in setting up access to specific users or groups is to configure the application to handle assignment of users or groups.
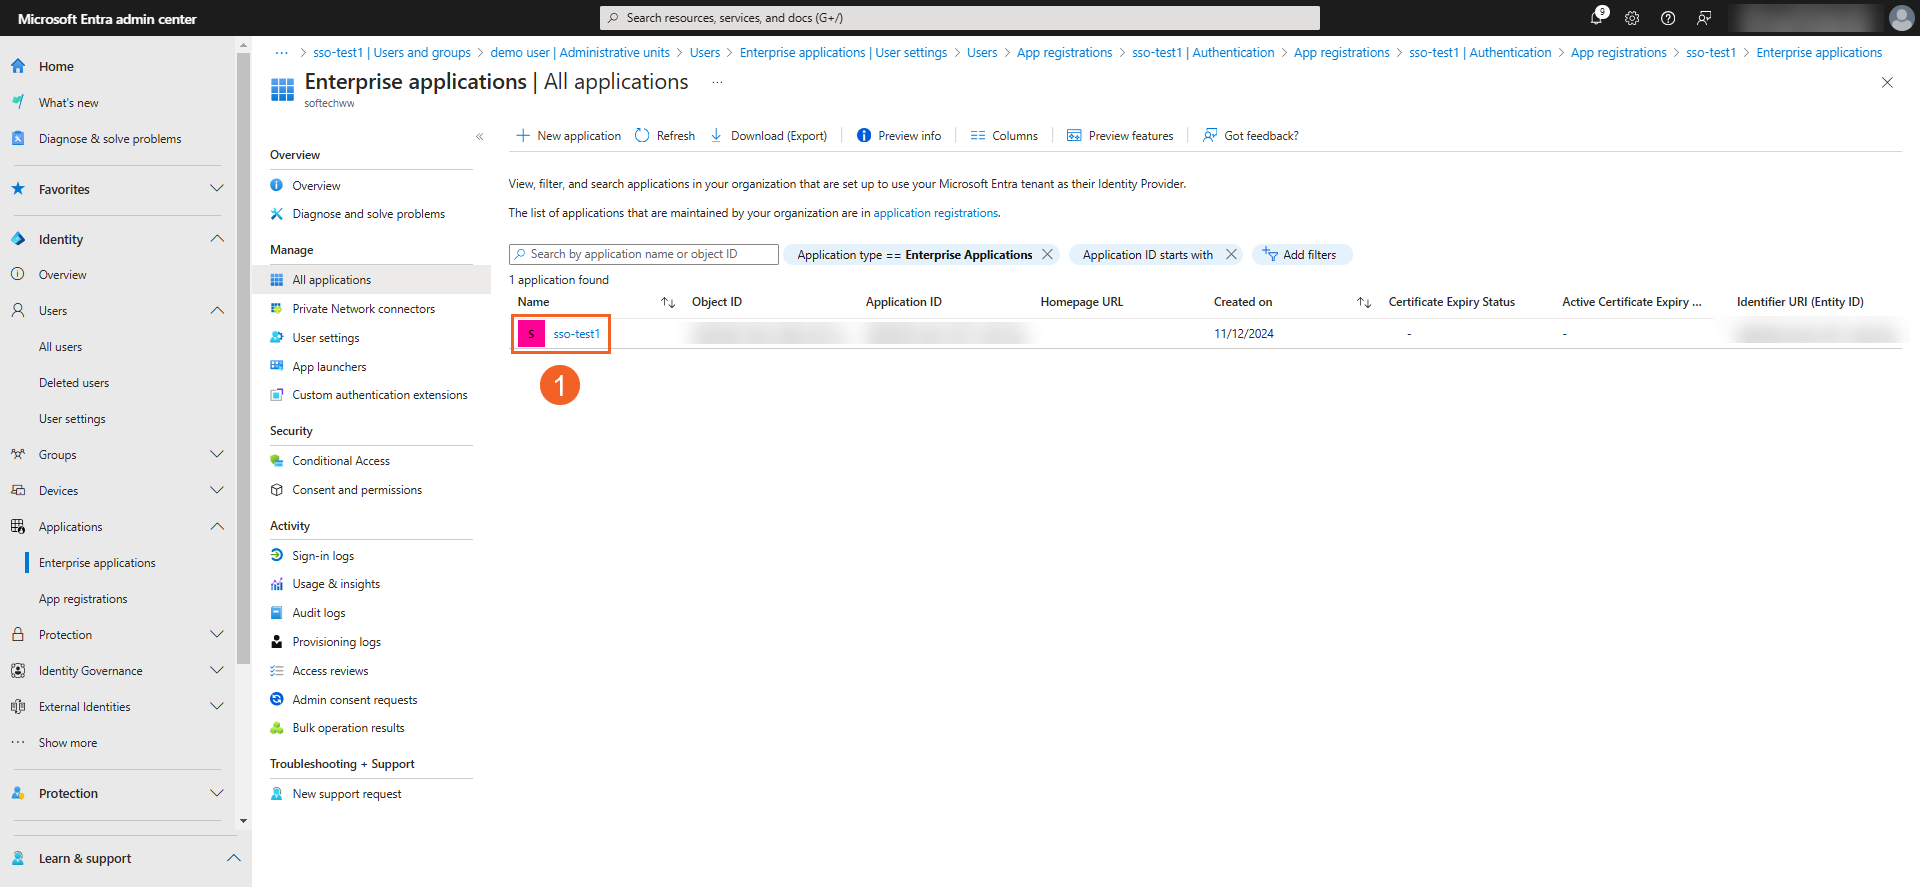
- Log into the Entra Admin Center and select your registered application via Identity > Applications > Enterprise applications.
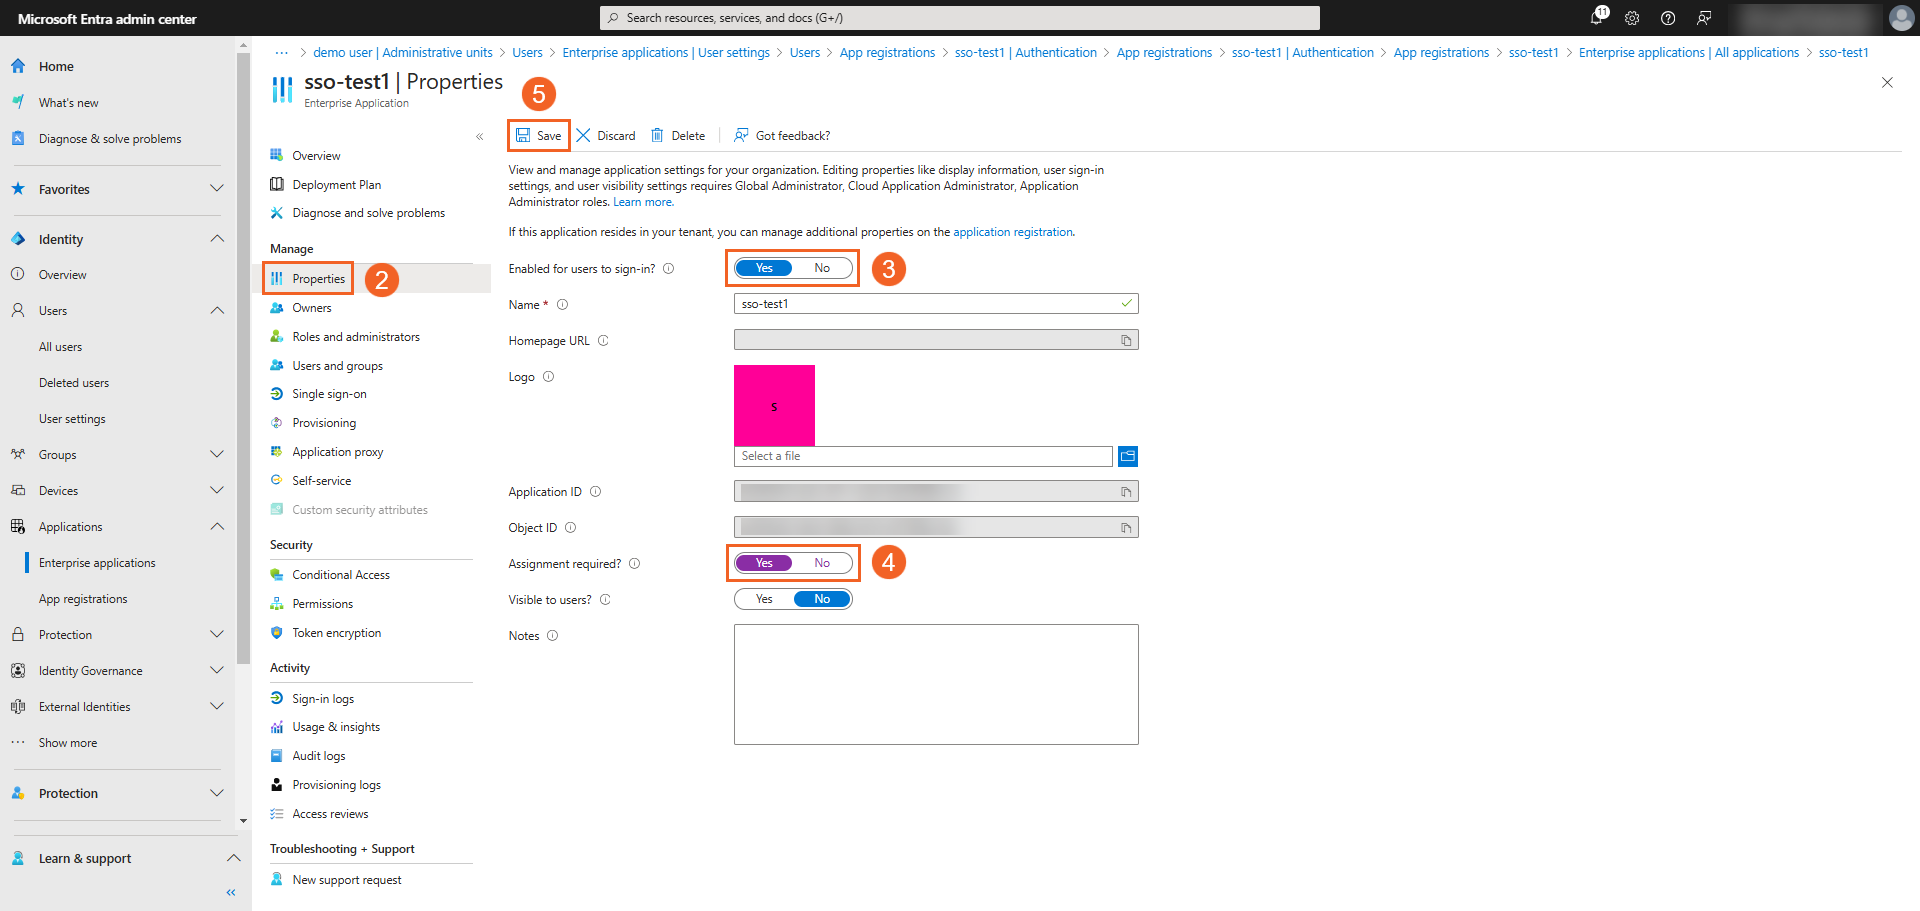
- Click Properties under the Manage section.
- Ensure that Enabled for users to sign-in is set to Yes.
- Set Assignment required? to Yes.
Assigning Users and Groups to Entra App
Once the application is configured to handle assignments, you need to add or assign users or groups in the application to grant them access to your VIDIZMO Portal through SSO.
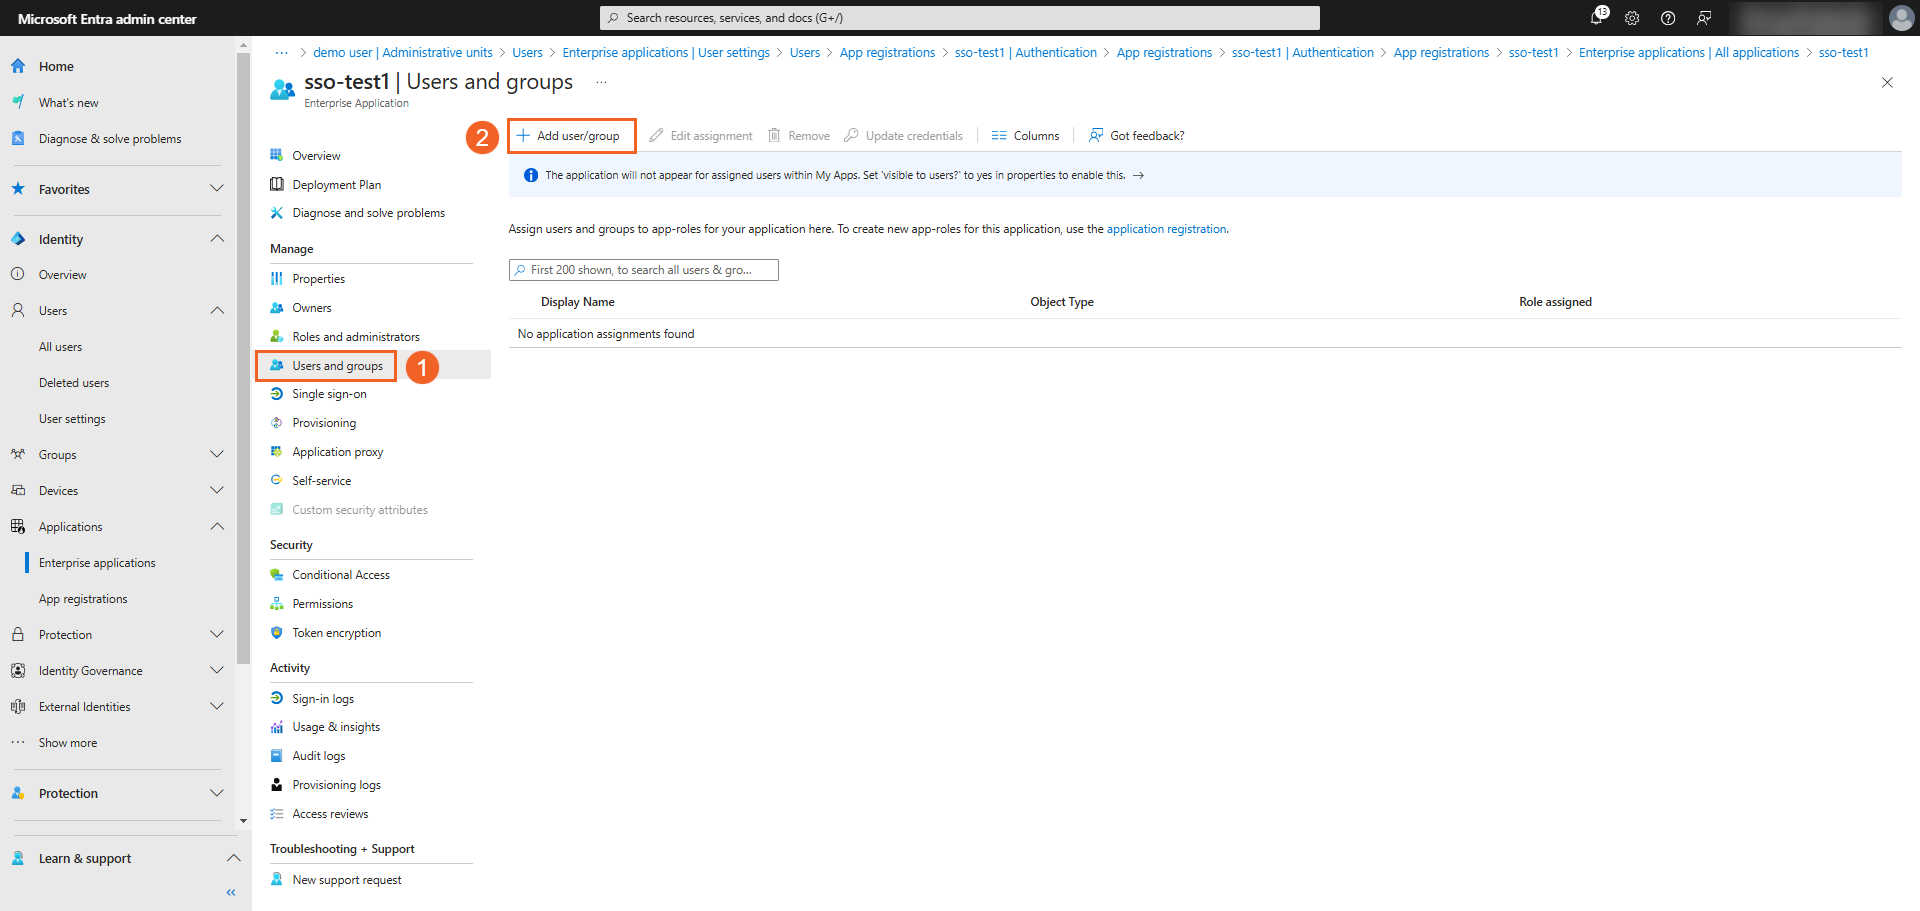
- Under Manage, select Users and groups.
- Click + Add user/group.
-
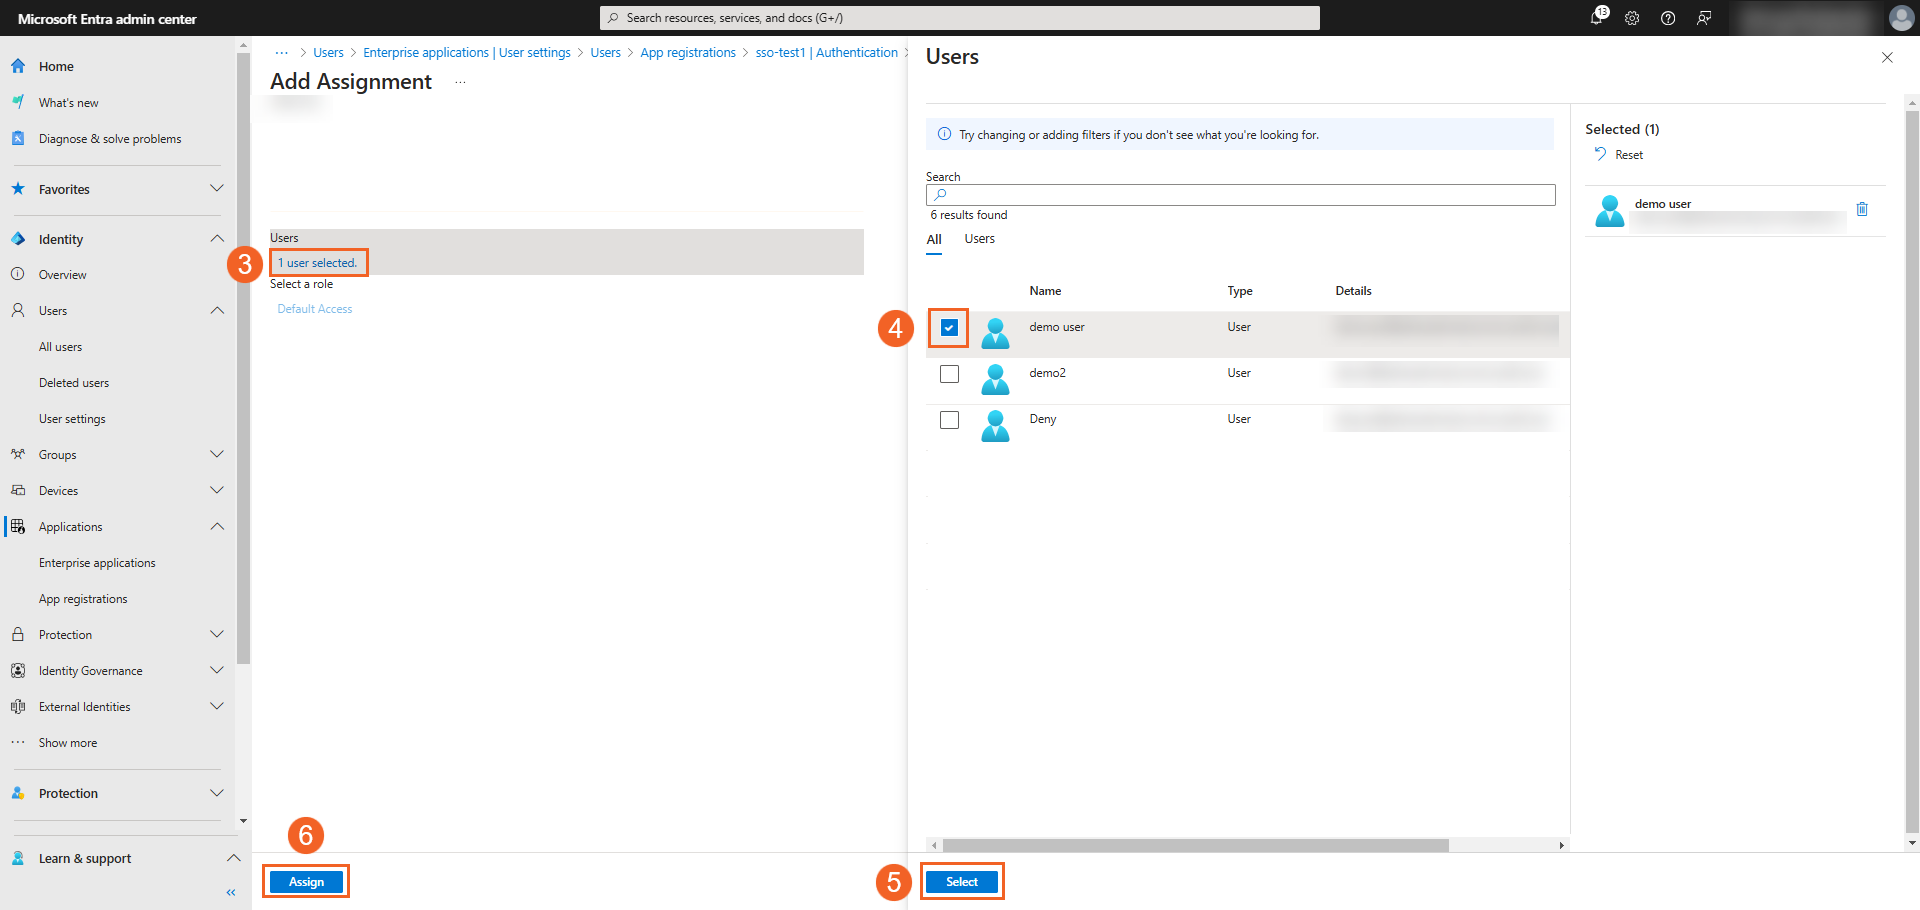
Click None Selected under users to add individual users (you need a role with Cloud Application permissions to do this). You can also assign Groups to the application that you have created in Entra. For this, you would need Microsoft Entra ID P1 or P2 with the role of IT admin with Cloud Application permissions.
-
On the Users pane, select the users you want to permit by selecting the checkboxes.
-
Click the Apply button, once you are done with the selection.
-
Once you are done with the assignments, click the Assign button.
Note: Ensure that you've enabled Group Synchronization in the VIDIZMO SSO application if the users belong to an Entra group.
Conclusion
Configuring Single Sign-On (SSO) with Microsoft Entra ID in VIDIZMO ensures secure and seamless user authentication. The straightforward setup process in both Microsoft Entra Admin Center and the VIDIZMO Portal simplifies integration while enabling robust access management and group synchronization. This integration enhances user experience, strengthens security, and streamlines administrative tasks, making it ideal for organizations of any size.